


Hey there! As a supplier of rhinitis treatment devices, I often get asked about how to install the parts of these devices. Today, I'm gonna walk you through the whole process step by step.
First off, let's talk a bit about the rhinitis treatment devices we offer. We've got a great range of products, like the Rhinitis Treatment Device, the Apparatus for Relieving Allergic Rhinitis, and the Rhinitis Treatment Instrument. Each of these devices is designed to effectively treat rhinitis and provide relief to those suffering from this annoying condition.
Before we start the installation, make sure you've got all the parts that came with your device. Usually, a rhinitis treatment device comes with a main unit, some nasal probes, power cords, and maybe some additional accessories depending on the model.
Step 1: Unpacking
When you first get your device, carefully unpack it from the box. Take out all the parts and lay them out on a clean, flat surface. Check if there are any visible damages to the parts. If you find anything wrong, don't try to install it right away. Contact our customer service, and we'll sort it out for you.
Step 2: Identifying the Parts
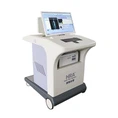
Let's start by getting to know the parts. The main unit is the core of the device. It's usually a small, compact box with some buttons and a display screen. The nasal probes are the parts that you'll insert into your nostrils. They're designed to deliver the treatment directly to the nasal passages. The power cord is what you'll use to plug the device into an electrical outlet.
Step 3: Connecting the Power Cord
Now, it's time to connect the power cord. Find the power input port on the main unit. It's usually marked clearly. Take the power cord and insert one end into the power input port on the main unit. Make sure it fits snugly. Then, plug the other end of the power cord into a grounded electrical outlet. Don't use any damaged power cords, as it can be dangerous.
Step 4: Attaching the Nasal Probes
Next, we'll attach the nasal probes to the main unit. Look for the probe connectors on the main unit. They're usually located on the side or the front. Take a nasal probe and find the corresponding connector on the probe. Align the connector on the probe with the connector on the main unit and gently push them together. You should hear a click sound, indicating that they're properly connected.
Step 5: Cleaning the Nasal Probes (Optional but Recommended)
Before using the nasal probes for the first time, it's a good idea to clean them. You can use a mild soap and warm water to gently clean the probes. Rinse them thoroughly and let them dry completely. This helps to ensure that the probes are clean and safe to use.
Step 6: Testing the Device
Once you've installed all the parts, it's time to test the device. Turn on the main unit by pressing the power button. Check if the display screen lights up and shows the device's status. You can also test the nasal probes by placing your finger near the tip of the probe. You should feel a gentle vibration or a slight sensation, which means the device is working properly.
Step 7: Adjusting the Settings
Most of our rhinitis treatment devices come with adjustable settings. You can adjust the intensity of the treatment, the treatment time, and other parameters according to your needs. Refer to the user manual that came with your device to learn how to adjust these settings. Start with a lower intensity and gradually increase it as you get used to the treatment.
Step 8: Using the Device
Now that you've installed and tested the device, you're ready to use it. Sit in a comfortable position and insert the nasal probes gently into your nostrils. Make sure they fit properly and don't cause any discomfort. Press the start button on the main unit, and the treatment will begin. Relax and let the device do its job.
Step 9: Cleaning and Maintenance
After each use, it's important to clean the nasal probes again. You can use a clean, dry cloth to wipe them down. Also, make sure to keep the main unit clean. Avoid getting any liquid on the main unit, as it can damage the internal components.
Troubleshooting
If you encounter any problems during the installation or use of the device, don't panic. Here are some common issues and solutions:


- Device not turning on: Check if the power cord is properly connected and if the electrical outlet is working. You can also try plugging the power cord into a different outlet.
- Nasal probes not working: Make sure they're properly connected to the main unit. You can try disconnecting and reconnecting them.
- Display screen not showing anything: Check the power supply and make sure the device is turned on. If the problem persists, contact our customer service.
In conclusion, installing the parts of a rhinitis treatment device is not that difficult. Just follow these steps, and you'll be able to set it up in no time. If you have any questions or need further assistance, don't hesitate to reach out to us.
We're always here to help you get the most out of our rhinitis treatment devices. Whether you're a medical professional looking to stock up on our products or an individual seeking relief from rhinitis, we've got you covered.
If you're interested in purchasing our rhinitis treatment devices, we'd love to have a chat with you. We can discuss your specific needs, provide more detailed product information, and offer competitive pricing. So, if you're ready to take the next step in treating rhinitis, let's start a conversation about procurement.
References
- Manufacturer's user manuals for rhinitis treatment devices.
- General medical knowledge about rhinitis treatment device installation.